 listicle
DIY Furniture Makeover Project Ideas 2026: 7 Easy Upgrades
Last Updated: November 8, 2026
Quick Summary
A furniture makeover updates an existing piece with paint, finish, hardware, or fabric instead of replacing it. In 2026, beginners should start with a flat-front dresser, simple side table, or straight-lined wooden chair, since these have forgiving surfaces and minimal repair work. Most dressers need only a good clean, light sanding on glossy spots, and two coats of paint.
- Beginners should pick pieces with a solid frame, minimal repair work, and a finish that hides brush marks.
- A side table takes 2 to 3 hours of active time and a six-drawer dresser takes 5 to 7 hours.
- Match the topcoat to use: Lacquer for dining tables and kitchen cabinets, Clear Wax for bedroom and accent pieces.
- Two thin coats is the standard for Chalk Paint®, with a third common on dark-to-light color changes.
- Keep and clean original hardware to save, since replacing a full dresser set is the biggest add-on.
Table of Contents
- Why DIY Furniture Makeover Projects Are Everywhere in 2026
- DIY Furniture Makeover Ideas for Beginners
- Vintage Furniture Makeover Ideas That Keep the Character
- Dresser Makeover Ideas: The Project Everyone Starts With
- Chalk Paint® Furniture Ideas for Finishes That Last
- Realistic Budgets, Timelines, and Skill Levels for Each Project
- Sourcing Thrifted and Secondhand Pieces Worth Your Time
- Choosing Your First Makeover Project at JunQtique
- Frequently Asked Questions
Why DIY Furniture Makeover Projects Are Everywhere in 2026
A furniture makeover is the practice of updating an existing piece with paint, finish, hardware, or fabric instead of replacing it. This guide walks through DIY furniture makeover project ideas in 2026, with notes on difficulty and time.
The appeal is easy to understand. A solid wood dresser from a thrift shop can cost less than a new one, and a weekend with a brush turns it into something nobody else owns. Many shoppers now treat secondhand pieces as the starting point, not the compromise.
Below, we show you exactly which projects suit a first-timer and which ones reward a little patience. But first, here is what most guides get wrong: they show the finished photo and skip the part where the project stalls. We will not do that.
DIY Furniture Makeover Ideas for Beginners
Beginners should start with a flat-front dresser, a simple side table, or a wooden chair with straight lines. These pieces have few curves, no glass, and forgiving surfaces, so a small mistake stays small.
The best beginner projects share three traits: a solid frame, minimal repair work, and a finish that hides brush marks. Chalk Paint® is a common choice here because it dries to a matte look that softens small imperfections.
A common mistake is choosing a piece with heavy veneer damage or missing trim. Fix those first and the paint is the easy part.
Start With Pieces That Forgive Mistakes
Look for pieces with flat panels, removable drawers, and legs you can reach with a brush. Skip anything with deep gouges, loose joints, or a wobbly frame, because structural repair is a separate skill.
- Frame is solid with no wobble
- Drawers slide without sticking
- Surface is flat, not heavily carved
- Hardware comes off with a screwdriver
- No glass or mirror panels to mask
Vintage Furniture Makeover Ideas That Keep the Character
The trick with vintage pieces is restraint. A 1940s tea cart or a record player stand already has a story, and the goal is to highlight it rather than cover it.
Keep original hardware when it is intact. Tape off brass pulls instead of replacing them, and let the patina show. A light-colored finish on the body with a darker top reads as intentional and preserves the age of the piece.
If you are new to older furniture, this guide to vintage furniture restoration tips for beginners covers how to work with worn surfaces without stripping away what makes them valuable.
Dresser Makeover Ideas: The Project Everyone Starts With
A dresser makeover is the ideal first project because the piece is large enough to matter and simple enough to finish in a weekend. Most dressers need only a good clean, light sanding on glossy spots, and two coats of paint.
Remove the drawers and hardware first. Paint the carcass, then the drawer fronts, then reattach the hardware once everything is dry. A soft blue or warm white keeps the piece flexible in a bedroom or hallway.
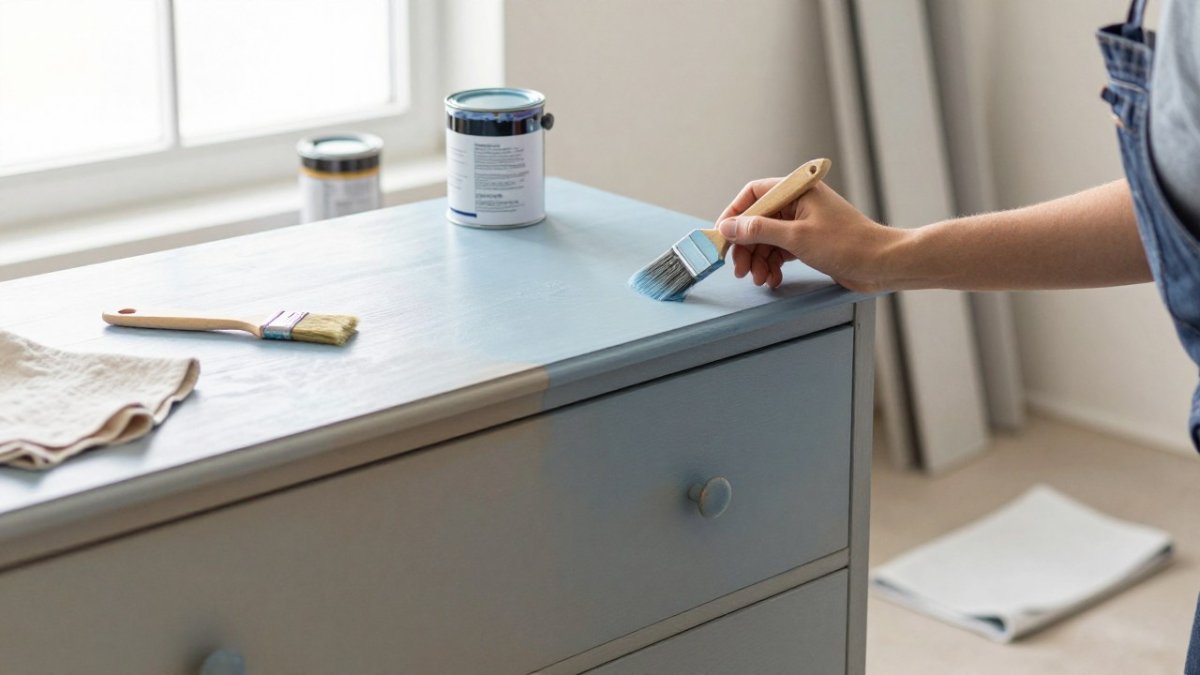
Watch out: painting drawer edges too thickly makes them stick once dry. Wipe the edges thin and test the fit before the final coat cures.
Chalk Paint® Furniture Ideas for Finishes That Last
Chalk Paint® furniture ideas come down to matching the topcoat to how the piece actually gets used. The paint itself is the color layer; the topcoat is what determines whether the finish survives a decade of coffee cups, keys, and kids. Choosing the wrong topcoat is the single most common reason a makeover looks tired after a year.
Annie Sloan offers several topcoat options, and each suits a different job. Clear Chalk Paint® Wax and Dark Chalk Paint® Wax are the wax options for finishing pieces, with Dark Wax adding age and definition in corners and details (How to Use Antique Wax Over Chalk Paint® - Techniques).
| Piece | Topcoat | Sheen | Why it works |
|---|---|---|---|
| Bedroom dresser | Clear Wax | Matte | Low traffic, soft look, easy to refresh |
| Dining table | Lacquer | Satin | Resists spills, heat, and daily wiping |
| Side table | Clear Wax | Matte | Easy to touch up in place |
| Kitchen or built-in cabinet | Lacquer | Satin or matte | Handles constant opening and cleaning |
| Vintage tea cart | Clear Wax with Dark Wax accents | Matte | Preserves patina and definition |
| Outdoor or porch piece | Lacquer | Satin | Best film build for humidity swings |
Application order matters as much as product choice. Follow the official Annie Sloan instructions for applying Chalk Paint® and your chosen topcoat, and allow each coat to dry fully before the next (How to Seal Chalk Paint™ - Techniques).
For high-use pieces, a topcoat helps protect the finish.
If you want the full method, our primer on how Chalk Paint works explains the products and the order to use them. For a streak-free result, follow these 7 steps to a smooth Chalk Paint finish.
Matching the Finish to How the Piece Gets Used
The table above is the short version. The longer rule is to match film hardness to cleaning frequency: pieces wiped weekly need Lacquer, pieces dusted occasionally are fine with wax, and pieces that will be repainted or restyled in a few years are easiest to redo when finished with wax. That is why wax remains the default for bedroom and accent furniture, and Lacquer is the default for anything in a kitchen or dining room.
Realistic Budgets, Timelines, and Skill Levels for Each Project
This section outlines planning factors, including time, skill, tools, and materials, so you can choose a project that fits your schedule before you start.
Three variables drive every project on this list. First, surface area: a side table has roughly 6 square feet of paintable surface, a six-drawer dresser closer to 30, and a full dining set can exceed 60. Second, the number of coats: two thin coats is the standard for Chalk Paint®, and a third is common on dark-to-light color changes. Third, dry time between coats, which is shorter than most beginners expect with Chalk Paint® but still sets the floor on how fast a project moves.
| Project | Active time | Dry/cure time | Skill | Tools | Materials |
|---|---|---|---|---|---|
| Side table | 2-3 hours | Overnight | Beginner | 2-inch brush, lint-free cloth, 220-grit pad | One quart Chalk Paint®, Clear Chalk Paint® Wax, wax brush |
| Six-drawer dresser | 5-7 hours | 1 weekend plus 24 hours | Beginner | 2-inch brush, small detail brush, screwdriver, drop cloth | One quart Chalk Paint®, Clear Wax, new pulls (optional) |
| Wooden chair | 3-4 hours | Overnight | Beginner | 1-inch brush, 220-grit pad, rag | One quart Chalk Paint®, Clear Wax |
| Vintage tea cart | 6-8 hours | 1 day plus cure | Intermediate | 1-inch brush, painter's tape, detail brush | One quart Chalk Paint®, Clear Wax, Dark Wax for accents |
| Kitchen or built-in cabinet | 8-12 hours | 1 weekend plus 5-7 days cure | Intermediate | 2-inch brush, angled brush, screwdriver, labeled bag for hardware | One to two quarts Chalk Paint®, Clear Wax or Lacquer, new pulls |
Active time
A few patterns hold across the table. New hardware is the most variable line item: keeping and cleaning original pulls costs nothing, while replacing a full dresser set is the single biggest add-on most beginners choose.
Skill level matters less than patience. If you can hold a brush at a consistent angle, tape an edge, and wait for paint to dry, you can finish any project on this list. The intermediate label on the tea cart and cabinet reflects fiddly areas, spindles, inset panels, and doors that must go back on square, not harder techniques.
We do not publish fixed prices because paint quantity, finish choice, and hardware swaps change the total. Check the JunQtique website for current pricing and availability before you start.
Sourcing Thrifted and Secondhand Pieces Worth Your Time
The best secondhand finds are solid wood, heavy for their size, and free of water damage. Knock on the underside: a dull, solid sound usually means real wood rather than particleboard.
Open every drawer and smell inside. A musty smell often signals moisture, which is hard to fix. Check the joints at the corners; loose joints are repairable, but a cracked frame rarely is.
Before you commit, learn how to tell if vintage furniture is solid wood so you do not bring home a piece that will not hold a finish.
Choosing Your First Makeover Project at JunQtique
Start with one piece, one finish, and one weekend. That is the whole method. Pick a dresser or side table, choose a Chalk Paint® color you love, and give yourself room to learn on something that does not need to be perfect.
At JunQtique, we stock Chalk Paint® supplies alongside curated vintage pieces and bespoke furniture, so you can either refinish a find or start with a piece that is ready to paint. If space is tight, our guide to bespoke furniture for small spaces shows options that fit compact rooms.
Your first project does not need to be flawless, it needs to be finished. JunQtique carries Chalk Paint® supplies, vintage treasures, and bespoke furniture so you can transform a room with pieces that feel like yours. Browse the collection, pick a color, and get started with JunQtique.
Frequently Asked Questions
What are some easy DIY furniture makeover ideas for beginners?
Start with small, flat-surfaced pieces: a side table, a stool, or a simple wooden chair. These let you practice brush control and finish work without a large time commitment. A dresser is the next step up and teaches you how paint behaves on drawers and edges. Avoid anything with heavy carving or major structural damage on your first attempt. Pick a piece you can finish in a weekend so momentum stays with you, and choose a forgiving color that hides small imperfections in the finish.
Can you use Chalk Paint® on vintage furniture?
Yes, and it is one of the most forgiving options for older pieces. The matte finish also suits the worn, lived-in look that vintage furniture makeovers aim for. Work in thin coats and let each one dry fully before adding the next.
How long does a DIY furniture makeover project take?
Plan around drying time rather than painting time, since that is what most first-timers underestimate. Working in a space with good airflow shortens the wait between coats.
How do you make an old piece of furniture look modern?
Change the finish and the hardware together, not just one. A light, low-sheen color on a traditional silhouette reads as current, and swapping dated pulls for simple metal or wood knobs finishes the update. Removing fussy details like ornate trim or old appliques also shifts a piece toward a cleaner look. Keep the lines of the original piece intact if they are good, and let color do the heavy lifting. A modern result usually comes from restraint: fewer colors, simpler hardware, and a matte or satin finish rather than high gloss.