 how-to
Vintage Furniture Restoration Tips for Beginners
Table of Contents
- Start With a Simple Decision: Clean, Touch Up, or Restore
- Vintage Furniture Restoration Tools You Actually Need
- How to Clean Old Furniture Without Damaging the Finish
- Repair Loose Joints and Structural Problems First
- How to Bring Life Back to Old Wood Furniture
- The Best Finish for Wood Furniture: How to Choose
- Safety, Ventilation, and Disposal for Beginner Projects
- Troubleshooting Common Beginner Mistakes
- Frequently Asked Questions
Last Updated: October 18, 2026
Start With a Simple Decision: Clean, Touch Up, or Restore
Vintage furniture restoration tips for beginners usually start with a choice, not a tool.
At JunQtique, we see this every week. Someone buys a beautiful old dresser, then jumps straight to the biggest possible project. That is how good pieces get ruined.
Here is the simple truth. Most vintage furniture does not need restoring. It needs cleaning and a little care.
The Four-Question Beginner Check
Ask these four questions before you touch the piece:
- Is the wood dry or cracking? Dry, flaky wood needs feeding, not stripping.
- Are the joints loose? A wobbly chair needs repair before any cosmetic work.
- Is the finish flaking or just dirty? Dirt comes off. Flaking finish means a bigger job.
- Do you love the original finish? If yes, preserve it. Do not paint over history you like.
Answer these and you have your plan. The rest of this guide follows that order.
Vintage Furniture Restoration Tools You Actually Need
You need fewer tools than the internet suggests, but the ones you do need should be chosen by task, not by brand hype. A beginner kit that covers cleaning, joint repair, surface refresh, and painting will handle most vintage pieces. Buy the next tier only when a specific project demands it.
Tier 1: The Starter Kit (Under $75 Total)
These items cover cleaning and minor repair, which is what most vintage furniture actually needs:
- Soft cotton cloths (a pack of 12): for dusting, wiping, and buffing. Old T-shirts work; avoid microfiber on fragile finishes because it can snag flakes.
- Mild soap: a few drops of a pH-neutral dish soap in warm water. Avoid ammonia-based cleaners, which dull old lacquer and shellac.
- Soft natural-bristle brush: a 1-inch sash brush reaches carved details and corners without scratching.
That kit handles the four-question check in the previous section and most cosmetic refreshes.
Tier 2: The Surface Refresh Kit (Add $40-$90)
Add these when the piece needs color or a protective topcoat:
- Tack cloth: picks up sanding dust before wax or paint. A damp cloth leaves lint; a tack cloth does not.
- Quality paint brush: a 2-inch synthetic brush for water-based products, or a natural-bristle brush for wax and oil. Cheap brushes shed bristles into wet paint, which is the most common beginner complaint.
- Annie Sloan Chalk Paint®: our paint of choice at JunQtique. Its official method needs no sanding, priming, or stripping first, so it replaces several tools a beginner would otherwise buy.
Tier 3: The Repair Kit (Add $50-$120)
Only buy these when a specific piece needs structural work:
- Hide glue: traditional on antique furniture and re-softens with warmth, which makes old joints easier to open and re-glue. A small jar lasts years.
- Thin brush or toothpicks: for working glue into narrow joints.
- Damp cloth: for wiping glue squeeze-out before it dries.
What to Skip Until You Need It
- Random-orbit sander: removes material fast and is the fastest way for a beginner to sand through veneer. Hand-sand spot areas first.
- Chemical stripper: only needed when a finish must come off completely. Many vintage pieces do not require it.
- Specialty scrapers and contour tools: buy them when a project demands one, not before.
A common pattern among beginners is buying a full 'restoration kit' online and using four of the twenty items. Start with Tier 1, add Tier 2 when you paint, and add Tier 3 only when a joint fails or a foot breaks.
How to Clean Old Furniture Without Damaging the Finish
Cleaning is the safest first step, and it often changes everything. A gentle wash removes decades of grime and reveals the finish underneath.
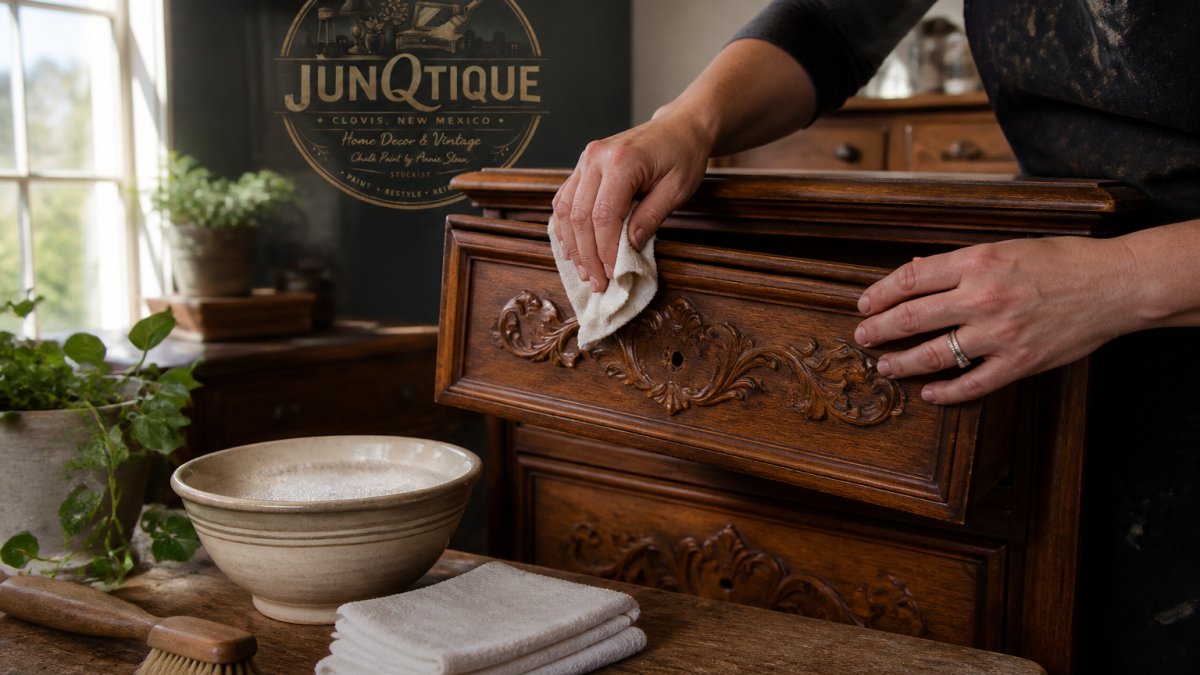
Work in this order:
- Dust with a dry cloth first.
- Mix a few drops of mild soap in warm water.
- Wring the cloth until it is barely damp.
- Wipe small sections, then dry right away.
- Use a soft brush for carved details.
Avoid ammonia-based cleaners and scourer pads. The National Park Service guidance on caring for wooden artifacts makes the same point: gentle cleaning protects historic surfaces better than harsh products.
Repair Loose Joints and Structural Problems First
Fix structure before looks. A wobbly leg or loose joint will undo your cosmetic work the moment the piece is used.
Most loose joints come down to old glue failing. The repair is usually simple:
- Work glue into the joint with a thin brush or toothpick.
- Press the parts together and wipe the excess.
- Clamp firmly and leave it overnight.
Hide glue is traditional on antique furniture and re-softens with warmth, which makes old joints easier to open and re-glue. Check casters and furniture feet too.
If a joint will not close, or a leg is split through the wood, stop.
How to Bring Life Back to Old Wood Furniture
Bringing life back to old wood furniture is mostly about moisture and patience, not heavy sanding. Dry wood looks tired because it has lost oil over the years.
Try this first:
- Clean the surface fully and let it dry.
- Apply a thin coat of furniture wax with a soft cloth.
- Work with the grain and buff after a few minutes.
Wax feeds the wood and restores the original luster without changing the color.
A common mistake is sanding a whole piece to fix one dull patch. Sand only where the surface is damaged.
The Best Finish for Wood Furniture: How to Choose
The best finish for wood furniture depends on three things: how the piece will be used, what finish is already on it, and whether the wood grain is worth showing. A finish is the protective layer that sits on top of the wood. It decides how the piece handles spills, heat, and daily wear, and it also decides whether the piece can be touched up later without a full strip.
Match the Finish to the Piece, Not to a Trend
- Wax: a soft, warm look that feeds dry wood and revives a dull surface. Best for low-traffic pieces like a bedroom dresser or a display shelf. Wax needs reapplication every year or two and does not resist water rings well.
- Oil: soaks into the wood rather than sitting on top. It deepens grain and is easy to spot-repair, but it needs reapplication over time and offers less protection than a film finish.
- Lacquer or varnish: a tough film that resists water and heat. Harder for beginners to apply well because it needs a clean, dust-free space and careful thinning. Once cured, it is difficult to touch up without visible witness lines.
Why Vintage Pieces Change the Calculation
Old furniture is not the same as new wood. Three factors matter:
- Existing finish compatibility. A new finish must bond to what is already there. Wax over a fresh oil finish will not cure. A water-based topcoat over an old oil-based varnish can bead or flake. Test any product on a hidden spot, such as the inside of a drawer or the underside of a seat, before committing.
- Veneer. Many vintage pieces use a thin veneer over a secondary wood. Sanding through veneer is permanent damage, which is why a finish that does not require sanding is a safer beginner choice.
- Historic patina. The darkening and wear on an old finish is part of the piece's value. A finish that preserves patina is often the better choice than one that erases it.
When Paint Beats Stain
Paint wins when the wood is mismatched, heavily marked, or simply not worth showing. Stain highlights grain, so it also highlights every flaw, including old water rings and patchy veneer repairs.
This is where Annie Sloan Chalk Paint® earns its place for beginners. The official Annie Sloan method skips sanding, priming, and stripping, so you can paint directly onto most old finishes.
Safety, Ventilation, and Disposal for Beginner Projects
Safety is the part beginners skip, and it is the part that matters most. Old finishes, strippers, and sanding dust all need respect.
Follow these basics on every project:
- Work outdoors or in a well-ventilated space.
- Wear a mask when sanding or stripping.
- Keep gloves on for any chemical product.
For disposal, follow local household hazardous waste rules. The EPA guidance on household hazardous waste explains why these products need special handling rather than a trash bin.
Vintage pieces can also carry dust or mildew from storage. Clean and air them out before bringing them inside.
Troubleshooting Common Beginner Mistakes
Most beginner problems have simple fixes. Here are the ones we hear about most.
| Problem | Likely Cause | Fix |
|---|---|---|
| Streaky paint | Brush too dry or paint too thick | Thin coats, better brush |
| White rings on wood | Heat or moisture damage | Wax and buff gently |
| Wobbly legs | Failed old glue | Re-glue and clamp overnight |
| Patchy stain | Uneven sanding | Sand evenly, use conditioner |
| Cloudy wax | Too much wax, not buffed | Buff with a clean cloth |
Two more habits save a lot of heartache. Test any product on a hidden spot first. And give each coat time to dry before judging the result.
Vintage furniture restoration rewards patience more than skill. Clean first, repair second, and finish last. That order alone prevents most beginner mistakes.
Frequently Asked Questions
What tools do beginners need to restore vintage furniture?
Start with a soft cloth, mild soap, a sponge, a screwdriver set, wood glue for loose joints, fine sandpaper, and a good brush. For painting projects, Annie Sloan Chalk Paint® needs no sanding, priming, or stripping, so you can skip several tools beginners usually buy. Add a drop cloth, gloves, and a small container for mixing. JunQtique carries professional-grade Chalk Paint® supplies and can help you match tools to your specific piece before you start.
What is the best finish for wood furniture?
The best finish depends on the piece and how it will be used. Wax gives an original luster and is easy to refresh, making it a strong choice for antique furniture you want to preserve. For pieces that see heavy daily use, a protective finish like lacquer or polyurethane adds durability. If the wood is too damaged to stain evenly, Annie Sloan Chalk Paint® offers a durable painted finish with no sanding or priming required. Match the finish to the piece, not the other way around.
Can you paint vintage furniture with Annie Sloan Chalk Paint®?
Yes. Annie Sloan Chalk Paint® is designed for exactly this: you paint directly onto most surfaces without sanding, priming, or stripping first. Clean the piece, let it dry fully, then apply thin coats with a good brush. Most pieces need two coats, and you can distress or wax afterward for the look you want. JunQtique sells Annie Sloan Chalk Paint® and supplies, and their team can help you pick a color and technique for your project.
How do you tell whether vintage furniture is worth restoring?
Check three things: structure, materials, and originality. Solid wood, dovetail joints, and original hardware usually justify restoration. Wobbly legs and loose joints are fixable with glue and clamps. Walk away from severe water damage, widespread wood rot, or heavy veneer loss unless you want a major project. If the piece has sentimental value or a maker's mark, it is often worth the effort even when the finish looks rough.
The hardest part of vintage furniture restoration is starting with the right piece and the right supplies. JunQtique curates vintage treasures and bespoke furniture, and we stock the professional-grade Chalk Paint® supplies that make a first project feel manageable. You get one-of-a-kind pieces and the tools to transform them, all in one place. Get started with JunQtique and bring an old piece back to life with a finish you will be proud to show.