 blog
What Supplies Do You Need for Chalk Paint Projects?
Last Updated: November 12, 2026
Quick Summary
Chalk paint supplies for home projects come down to five basics: paint, a good brush, wax or topcoat, a lint-free cloth, and fine sandpaper. One quart of paint covers a small dresser or a set of chairs, and a standard tin of wax handles several chairs.
- Flat brushes cover large flat areas fast, while round brushes handle trim, legs, and curves.
- Apply wax thin, buff off the excess with a lint-free cloth, and let the piece cure for several days.
- A sample pot covers a frame, a tray, and a couple of candle holders with paint to spare.
- Two thin coats always beat one thick coat, and a thick coat stays sticky for days.
- Dust waxed pieces with a dry cloth and re-wax high-touch areas once a year.
Table of Contents
- The Best Chalk Paint Supplies for Home Projects, at a Glance
- Chalk Paint Brushes: Why Size and Bristle Matter
- Chalk Paint Wax and Topcoat: Sealing the Velvety Finish
- Chalk Paint for Crafts: Scaling Supplies Down for Small Pieces
- How the Supplies Work Together on a Real Furniture Makeover
- Matching Supplies to Surface and Condition
- Building Your Supply Kit With JunQtique
- Frequently Asked Questions
The Best Chalk Paint Supplies for Home Projects, at a Glance
Chalk paint supplies for home projects come down to five basics: paint, a good brush, wax or topcoat, a lint-free cloth, and fine sandpaper. Get those right and you can refresh a dresser, a picture frame, or a whole dining set without a garage full of tools.
Chalk Paint® is designed to go on many surfaces with minimal preparation, so you can keep your supply list short (How to paint furniture with Chalk Paint® - A Beginner's Guide).
Below, we break down each essential and show how they work together on a real piece.
The Core Five: Paint, Brush, Wax, Cloth, Sandpaper
Every project needs these five, and each has a clear job.
- Paint: The color and the finish. One quart covers a small dresser or a set of chairs.
- Brush: Applies the paint. Bristle brushes give that textured, vintage look.
- Wax or topcoat: Seals the paint and adds depth. Clear wax keeps colors true.
That is the whole foundation. Everything else is a nice extra.
Chalk Paint Brushes: Why Size and Bristle Matter
The brush you choose changes how the paint lands on the wood.
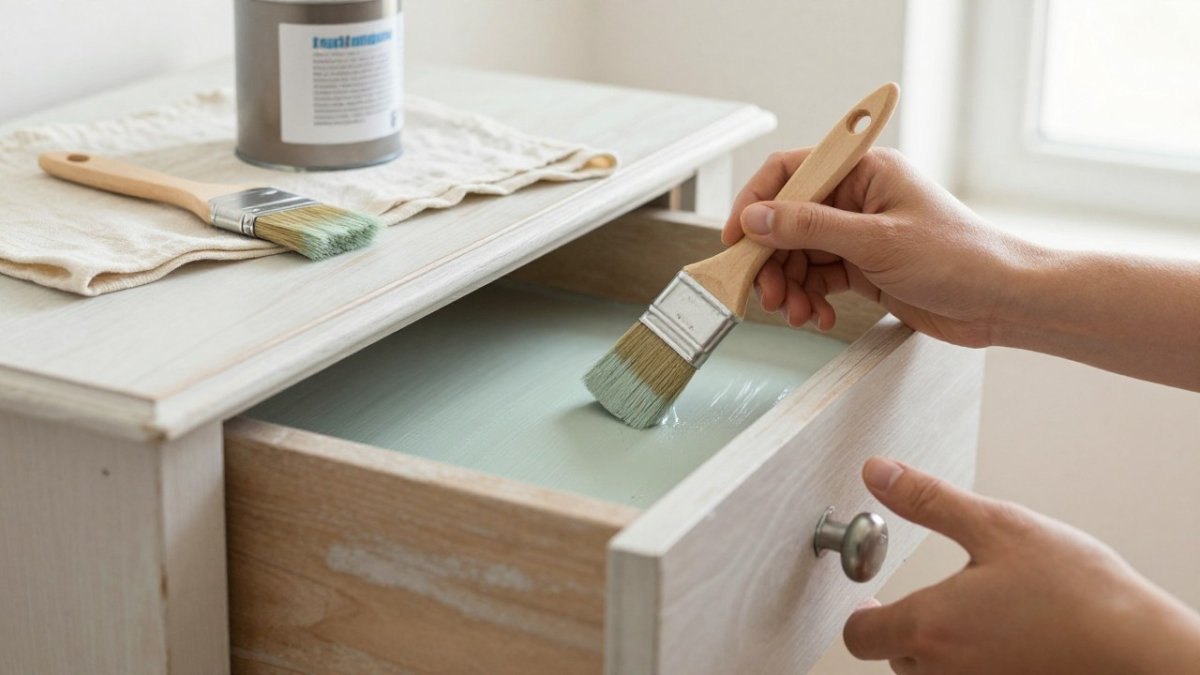
Size matters just as much. A wide brush speeds up big flat panels. A small brush gets into corners, spindles, and carved details.
One brush for the whole piece means either a slow crawl on big surfaces or a sloppy edge on the details.
For beginners who want a clear walkthrough, our guide on how to choose the best chalk paint brushes for beginners covers the full selection process.
Round vs. Flat Brushes for Furniture and Details
Flat brushes cover large, flat areas fast. Round brushes handle trim, legs, and curves. Most projects need both.
If you are painting fine details or decorative shapes, a detail brush set gives you control in tight spots.
For textured, vintage finishes on curved pieces, a small round bristle brush works the paint into the grain beautifully.
And for broad tabletops or cabinet doors, a large flat brush saves time and keeps the coat even.
Best for: homeowners painting one or two pieces who want a clean, textured result without a big toolkit.
Chalk Paint Wax and Topcoat: Sealing the Velvety Finish
Wax turns chalk paint from flat to velvety, protecting the paint, deepening the color, and giving that soft, touchable sheen people love (FAQs | Chalk Paint® & Tools). But wax is only one option in a finishing system, and the choice decides how the piece holds up a year from now.
Think of the seal coat as a decision with three variables: how much shine you want, how much traffic the piece sees, and how often you are willing to reapply. Wax wins on appearance. A hard topcoat wins on durability. Most home projects need one or the other, and some need both in different places.
Wax vs. Topcoat: How to Choose
| Finish | Look | Durability | Best For | Reapplication |
|---|---|---|---|---|
| Clear wax | Soft matte to satin sheen | Moderate; softens with wear | Dressers, frames, décor, low-traffic pieces | Buff and re-wax every year or two |
| Dark wax | Antiqued, deepened grain | Moderate | Carved details, vintage looks | Spot re-wax as needed |
| Hard topcoat | Flat to satin, slightly more film-like | High; resists water and scuffs | Tabletops, kitchen chairs, kids' furniture | Rarely, if applied correctly |
| Wax plus topcoat | Velvet depth with a harder shell | Highest | Dining sets, entryway pieces | Topcoat rarely; wax touch-ups |
A common pattern is to wax the whole piece for the look, then add a hard topcoat only on the surfaces that get touched every day, the top of a dresser, the seat of a chair, the edge of a table. That gives you the velvety finish where you see it and the durability where you need it.
How Much Wax and Topcoat a Project Actually Needs
Coverage is where most beginners overshoot. A thin coat is the goal, and thin coats go further than people expect.
- A small décor item, a frame, tray, or candle holder, needs only a trace of wax; a sample-size tin is plenty for several pieces.
- A single chair typically takes a thin coat over the frame and a slightly heavier coat on the seat, and one standard tin of wax handles several chairs.
- A dresser usually takes one tin of wax for two thin coats, with a little left over for touch-ups.
The rule of thumb most practitioners use: if the wax feels tacky after buffing, you applied too much. Two thin coats always beat one thick coat, and a thick coat stays sticky for days.
Applying Wax and Topcoat Without Ruining the Finish
Apply wax thin, rubbing it in with a cloth or brush, then buff off the excess with a lint-free cloth in small sections so the wax does not set before you buff.
A hard topcoat goes on with a brush or applicator in a thin, even layer.
For sealing and protecting the finish, clear chalk paint wax locks in that soft, velvety look on most furniture and décor pieces, and it is the right starting point for anyone new to finishing.
Caring for the Finish Over Time
Waxed pieces are easy to maintain. Dust with a dry cloth, wipe spills promptly, and re-wax high-touch areas once a year. Avoid harsh cleaners and silicone polishes, which can strip wax and leave a hard-to-remove film.
If a waxed surface starts to look dull or dry, a fresh thin coat restores the sheen without stripping anything. That is the quiet advantage of wax: it is repairable.
Chalk Paint for Crafts: Scaling Supplies Down for Small Pieces
Small pieces need small tools. Picture frames, trays, and candle holders do not need a full-size brush or a quart of paint, and buying full-size supplies for a craft project is the fastest way to end up with a shelf of half-used tins.
Scale down to a detail brush, a sample pot, and a soft cloth. The same steps apply, just in miniature.
Craft projects are a great way to test a color before committing to a whole dresser. Paint a frame first. Live with the shade for a week.
A Project-Based Supply List
The clearest way to buy only what you need is to plan by project type. Here is how the supplies break down across three common home projects.
| Project | Paint | Brush | Seal | Extras |
|---|---|---|---|---|
| Small décor (frame, tray, candle holder) | Sample pot | Detail brush | Small wax tin | Soft cloth, fine sandpaper |
| Single chair | Sample pot or small tin | Round brush plus small flat brush | Standard wax tin | Lint-free cloth, fine sandpaper |
| Dresser | Quart | Large flat brush plus round detail brush | Standard wax tin, optional topcoat | Lint-free cloths, fine sandpaper, painter's tape |
The pattern is simple: the smaller the piece, the smaller the pot and the finer the brush. A sample pot covers a frame, a tray, and a couple of candle holders with paint to spare; a quart is right once you move up to a dresser or a set of chairs.
Planning Quantity Before You Buy
Coverage is the number most beginners get wrong. Chalk Paint® goes on thin, and thin coats cover more than people expect.
A useful habit: measure the surface area before you shop, length times width for flat panels, plus a rough allowance for legs and trim. Two thin coats use less paint than one thick coat, and the finish is better besides.
Budget Planning for a Small Project
A craft project is the cheapest way into chalk paint, and the supply list is short enough to plan around. Pricing depends on quantity, dates, and delivery; check JunQtique's website for current prices or a quote.
If you are building a kit over time, buy the core supplies for one small project first, then add larger brushes and full-size tins when a bigger piece comes along, so your spending matches your actual projects.
Tips for Small Work
- Use a light touch with wax on tiny surfaces; a little goes a long way on a frame.
- Keep sandpaper fine so you do not burn through edges.
- Work in good light so you catch drips early.
Watch out: a full-size brush on a small frame leaves brush marks that are hard to sand out without cutting through the paint. Match the brush to the piece, not to the paint tin.
This is also where a beginner can build confidence fast. One small win leads to the next bigger project, and the supplies you bought for the frame carry straight over to the chair.
How the Supplies Work Together on a Real Furniture Makeover
Here is the whole kit in action on a vintage dresser. The steps are simple, and the supplies do most of the work.
- Wipe it down. Remove dust and grime with a damp cloth. Let it dry fully.
- Paint. Load a flat brush and apply thin, even coats. Let each coat dry.
- Detail the edges. Switch to a round brush for trim and curves.
- Sand lightly. Soften edges with fine sandpaper for a worn, vintage look.
- Seal. Apply clear wax in a thin layer, then buff with a lint-free cloth.
That is the full cycle. No stripping, no heavy sanding, no primer.
The supplies are built to work as a system. The paint grips, the brush textures, the sandpaper softens, and the wax protects. Skip one and the finish shows it.
Matching Supplies to Surface and Condition
Different surfaces ask for slightly different tools. A smooth laminate top behaves nothing like rough reclaimed wood.
| Surface | Brush Choice | Extra Supply | Why |
|---|---|---|---|
| Smooth laminate | Flat synthetic | Light wax coat | Paint needs a flatter lay-down |
| Rough wood | Bristle brush | Fine sandpaper | Texture works with the grain |
| Carved details | Round detail brush | Small cloth | Reaches tight spots |
| High-traffic tops | Flat brush | Topcoat | Adds a harder, durable seal |
| Small crafts | Detail brush | Sample pot | Matches scale of the piece |
Condition matters too. A piece with chipped edges looks great with a distressed finish. A clean, modern piece often suits a smoother coat.
Building Your Supply Kit With JunQtique
Start with the core five, add tools as your projects grow, and keep your kit organized so you can start the next makeover without a shopping trip.
JunQtique offers Chalk Paint® supplies alongside vintage treasures and bespoke furniture.
Here is one way to start:
- Pick one small project to test your supplies
- Buy the core five before anything else
- Add a detail brush and a topcoat as you grow
Ready to bring an old piece back to life?
The hardest part of any makeover is often just starting. JunQtique makes it easier with professional-grade Chalk Paint® supplies, curated vintage pieces, and bespoke furniture, all in one inviting collection.
Frequently Asked Questions
What supplies do I need for a chalk paint project?
A basic chalk paint supplies kit covers five items: the paint itself, a brush sized to your piece, a wax or topcoat for protection, a lint-free cloth for buffing, and fine sandpaper for smoothing between coats. Add painter's tape for edges and a small spray bottle of water for thinning. For crafts, swap the large brush for a smaller round one. Everything else is optional, so start with the core five and add tools as your projects grow.
Do I need a wax or topcoat after chalk paint?
Yes, if the piece gets touched, sat down on, or wiped down. Chalk paint dries to a matte, velvety finish that looks beautiful but stays porous, so a wax or topcoat locks in the color and adds water resistance. Wax gives a soft sheen you can buff to taste. A liquid topcoat suits high-traffic pieces like tabletops and kitchen cabinets. On decorative crafts that nobody handles, you can skip it, but furniture almost always benefits.
What brushes work best with chalk paint?
Natural-bristle brushes made for chalk paint give the smoothest results because the bristles flex and release paint evenly. A round brush handles spindles, trim, and carved details; a flat brush covers drawer fronts and tabletops faster. Avoid cheap foam brushes on furniture, since they leave streaks and shed. Keep one small brush for crafts and one larger brush for furniture so you are not switching mid-project.
Is there a difference between chalk paint and chalkboard paint?
They are different products with different jobs. Chalk paint is a furniture and décor paint that dries to a matte, velvety finish and is meant to be sealed with wax or topcoat. Chalkboard paint creates a write-on, wipe-off surface for menus and labels. If you want a vintage look on a dresser, you want chalk paint. If you want to write the grocery list on a cabinet door, you want chalkboard paint.