 how-to
7 Steps to a Smooth Chalk Paint Finish Every Time
Last Updated: October 28, 2026
Quick Summary
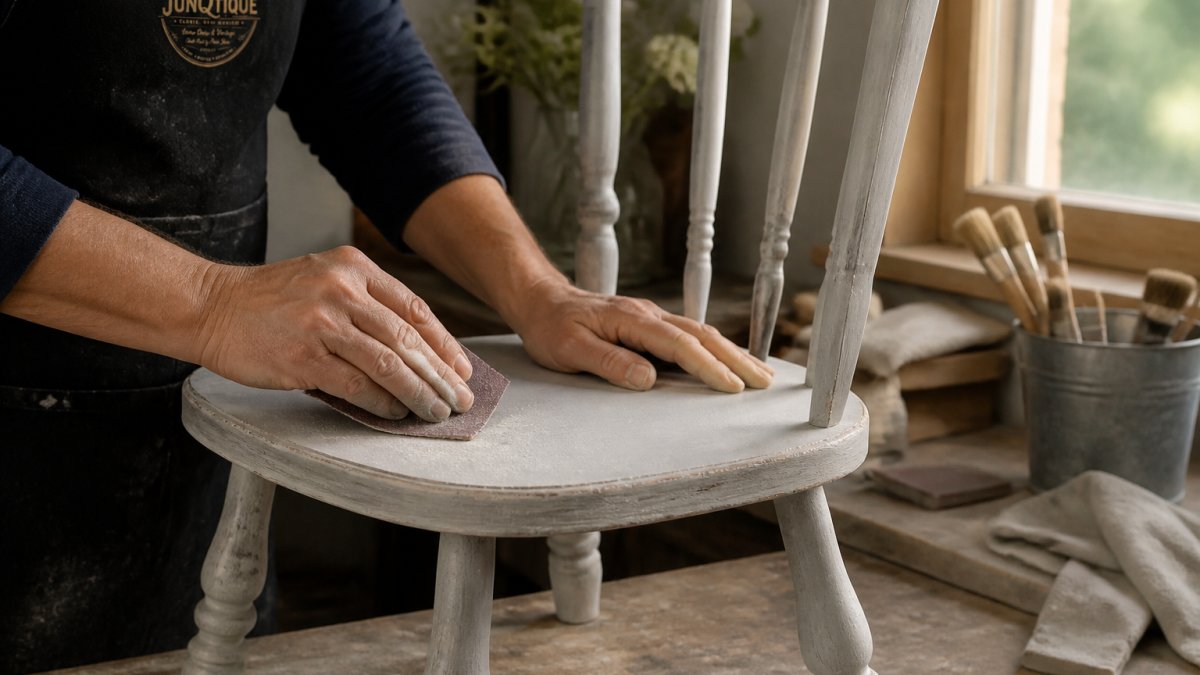
To get a smooth chalk paint finish, apply thin, even coats and sand lightly between each one with fine-grit sandpaper. Wipe away all dust, let every coat dry fully, then seal and buff the surface for a uniform sheen.
- Light sanding with around 120-grit gives the paint something to grip before the first coat.
- Sand between coats with fine 220-grit and a light hand to knock down brush strokes.
- Thin coats are the single biggest lever for a smooth chalk paint finish.
- Buff the cured sealer with a soft cloth or brown paper bag for a buttery smooth result.
- Most rough finishes come from too much paint, skipped sanding, or trapped dust.
Table of Contents
- Why Chalk Paint Looks Textured (and What Actually Smooths It)
- The 7-Step Workflow for a Smooth Chalk Paint Finish
- Choosing the Best Brush for Chalk Paint
- How to Avoid Brush Marks in Chalk Paint
- How Many Coats of Chalk Paint Do You Need?
- The Best Finish Over Chalk Paint: Wax, Sealer, or Topcoat
- Troubleshooting a Rough or Uneven Finish
- Pick Your Paint and Supplies at JunQtique
- Frequently Asked Questions
Why Chalk Paint Looks Textured (and What Actually Smooths It)
Chalk paint is a decorative paint known for its matte, chalky texture, a feature, not a flaw. But many people want a smoother, more modern look, and you can get a smooth chalk paint finish without switching products.
What actually smooths it is mechanical work and patience: light sanding between coats knocks down high spots, thin even coats stop ridges from building up, a good brush helps, and a sealer locks the result in.
For official product details, our Chalk Paint fact sheet lays it out plainly.
Below, we'll walk through the full seven-step workflow, then cover brushes, coats, sealers, and how to fix a finish that already went rough.
The 7-Step Workflow for a Smooth Chalk Paint Finish
Here is the complete order of operations, from clean surface to sealed, buffed finish. Follow the steps in sequence, skipping ahead is the most common reason a finish turns out uneven. The Chalk Paint workbook lets you follow the seven-step workflow with guided practice. The table is the at-a-glance version; the subsections explain the mechanism behind each step.
| Step | Action | Key Detail | Typical Timing |
|---|---|---|---|
| 1 | Clean and dry | Remove dirt and grease, let it dry fully | 30-60 minutes dry time |
| 2 | Light sand and wipe | Scuff the surface, wipe away all dust | 10-15 minutes |
| 3 | Thin and apply coat one | Add water sparingly, brush thin even coats | 1-2 hours between coats |
| 4 | Sand between coats | Light pressure, fine grit, wipe clean | 5-10 minutes per coat |
| 5 | Apply final coat | Thin, even, one direction | 1-2 hours before sealing |
| 6 | Seal | Wax or lacquer, thin layers | 24 hours cure before buffing wax |
| 7 | Buff | Soft cloth or brown paper bag | 10-20 minutes |
Step 1: Clean the Surface and Let It Dry
A clean surface is the foundation of a smooth finish. Wipe the piece with a damp cloth and mild cleaner to lift dirt, grease, and old polish, then let it dry completely. Paint won't bond evenly over a damp or greasy spot, and those spots show up later as rough patches. Pieces often feel dry while still holding moisture in seams and joints, so give the full dry time.
Step 2: Sand Lightly and Wipe Away Dust
Light sanding gives the paint something to grip and knocks down surface imperfections. Use medium-grit sandpaper (around 120-grit), then wipe away every bit of dust with a tack cloth, trapped dust creates raised texture you'll fight for the rest of the project. If the surface already feels smooth, a light scuff is enough; if it feels rough or has old finish ridges, spend more time with the medium grit.
Step 3: Thin the Paint and Apply Even Coats
Thin coats are the single biggest lever for a smooth chalk paint finish. Dip your brush lightly and brush the paint out in long, even strokes; if it feels thick, add water a few drops at a time and stir well. Overloading the brush lays down too much paint and leaves ridges. If the paint drags or leaves ridges, add a few more drops of water; if it runs or looks translucent, you've thinned too far, add a little paint back.
Step 4: Sand Between Coats
Sand between coats with fine-grit sandpaper (around 220-grit) and a light hand, you're not removing paint, just smoothing the surface and knocking down brush strokes. Wipe off the dust, then apply your next coat. This is the step most people skip and the one that makes the biggest difference. If you see color on the sandpaper, you're pressing too hard, lighten up immediately.
Step 5: Apply the Final Coat
Apply the final coat thin and even, brushing in one direction so any remaining texture aligns rather than crisscrosses. Let it dry fully before sealing, if it still feels cool or tacky, it isn't ready. Rushing this step traps moisture under the sealer and leads to a soft, uneven finish.
Step 6: Seal the Finish
Our Chalk Paint lacquer fact sheet covers choosing and applying the right topcoat.
Step 7: Buff for a Smooth Result
Once the sealer has cured, buff with a soft cloth or brown paper bag for a buttery smooth result. Buffing evens out the sealer film and warms the surface slightly so wax settles into a uniform sheen. Work in small circles and check the sheen from an angle as you go.
Choosing the Best Brush for Chalk Paint
One insider tip: a brush that feels slightly stiff works better than a floppy one. You want control, not a mop.
How to Avoid Brush Marks in Chalk Paint
The thing nobody tells you about chalk paint is that speed and thinness beat technique tricks. A thin coat you move quickly across the surface will always beat a thick coat fussed over with a fancy brush.
How Many Coats of Chalk Paint Do You Need?
Let each coat dry fully before the next. If a coat still feels cool or tacky to the touch, it is not ready. Rushing the second coat traps moisture and leads to a soft, uneven finish.
The Best Finish Over Chalk Paint: Wax, Sealer, or Topcoat
| Finish | Look | Best For |
|---|---|---|
| Wax | Soft, matte, traditional | Low-traffic pieces, vintage style |
| Lacquer topcoat | Hard, modern, durable | Chairs, tables, daily-use furniture |
| Water-based sealer | Clear, low sheen | Pieces where you want the paint color to stay true |
Troubleshooting a Rough or Uneven Finish
A rough finish almost always traces back to a handful of causes: too much paint, skipped sanding, dust left behind, paint that was too thick, or painting in the wrong conditions. The table below maps each symptom to its likely cause and fix, find your symptom, then work the fix before adding more paint or sealer.
| Symptom | Likely Cause | Fix |
|---|---|---|
| Raised texture | Thick coats or trapped dust | Sand lightly with 220-grit, wipe, recoat thin |
| Visible brush strokes | Overloaded brush or fast dry | Thin the paint, use long strokes, work small sections |
| Gritty texture | Dust or dried paint flakes in the coat | Wipe with a tack cloth, sand with 220-grit, recoat |
| Clumps or lumps | Paint too thick or not stirred | Stir well, add water a few drops at a time, strain if needed |
| Raised grain | Moisture or thin paint raising the surface | Sand lightly with fine grit, seal before recoating |
| Uneven sheen | Thin or patchy sealer | Add another thin sealer coat, buff evenly |
| Soft, tacky surface | Coats applied too soon | Let each coat cure fully before the next |
Diagnosing by Symptom
Raised texture is the most common complaint, usually from a coat that went on too thick or dust trapped under it. The fix is mechanical: sand lightly with 220-grit, wipe away all dust with a tack cloth, and recoat thin. Don't try to bury the texture under more paint, that makes it worse.
Gritty texture feels like sand under the paint, usually dust or dried paint flakes from the rim of the can. Wipe with a tack cloth, sand with 220-grit, and recoat. Keeping the can rim clean prevents most of this.
Raised grain happens when moisture or thin paint raises surface fibers. Sand lightly with fine grit, seal the surface, and recoat, it's more common in humid conditions.
Drying and Curing Conditions
Drying and curing conditions matter too. Paint in a space that isn't too cold or humid, and give each coat real time to set. A finish often feels dry to the touch while still soft underneath, so judge readiness by feel and time, not the clock alone. Rushing turns a smooth finish rough; in humid spaces, allow extra dry time between coats and before sealing.
Pick Your Paint and Supplies at JunQtique
Getting a smooth chalk paint finish comes down to a clean surface, thin coats, light sanding between layers, and a good sealer. The supplies you start with decide how easy that method is to follow.
At JunQtique, we stock professional-grade Chalk Paint supplies. Browse the full Chalk Paint color card to pick your shade.
Frequently Asked Questions
How do I make chalk paint feel smoother?
Light sanding is the main lever. After each coat dries, dust the surface with 220-, 300-, or 400-grit sandpaper, then wipe away the dust before the next coat. Thinning the paint slightly with water and applying thin, even coats also reduces raised texture. Finish with a wax or topcoat and buff it out; that step is what turns a matte, chalky surface into something closer to smooth as glass.
Can I sand between coats of chalk paint?
Yes, and you should. A light dusting with 220-, 300-, or 400-grit sandpaper between coats knocks down raised texture and brush ridges before they build up. Keep the pressure light so you do not cut through the color, and wipe off all dust with a tack cloth or damp rag before recoating. The Purple Painted Lady recommends this exact grit range for smoothing a chalk-painted finish.
What is the best brush for chalk paint to achieve a smooth finish?
A good synthetic-bristle brush holds its shape in water-thinned paint and lays down thin, even strokes. Natural-bristle brushes can shed and leave texture on a smooth finish. Whatever brush you use, load it lightly, keep the strokes long and in one direction, and sand between coats. If brush marks persist, switch to a foam roller for flat panels and reserve the brush for edges and details.
What is the best finish to apply over chalk paint?
Wax is the traditional choice: it deepens the color, adds a soft sheen, and can be buffed to a smooth feel. A water-based topcoat or sealer is better for high-traffic pieces like dining tables and kitchen cabinets because it resists water and cleaning. Whichever you pick, apply thin layers, let each one dry, and buff or sand lightly between them for the smoothest result.
Your next piece of furniture is one careful workflow away from a finish you'll be proud to show off. Start with the right paint and tools, take the steps in order, and let each coat do its job. Get started with JunQtique and bring your smoothest, most beautiful finish yet to life.