 how-to
How Do You Stop Chalk Paint From Looking Streaky?
Last Updated: October 25, 2026
Quick Summary
You stop chalk paint streaks by loading the brush lightly, applying thin even coats, and never going back over paint that has started to dry. Chalk paint streaks come from too much paint, the wrong brush, or recoating too soon, so use a wide flat brush with soft bristles and sand lightly between coats.
- Chalk paint usually dries to the touch in about 30 minutes to an hour.
- Most pieces are ready for a second coat in one to two hours.
- Use a foam roller on large flat areas, then tip off roller marks with a dry brush.
- Add a little water to the tin until the paint is like heavy cream.
- Above roughly 80 degrees Fahrenheit, work in sections of a couple of feet and keep a wet edge.
Table of Contents
- Why Does Chalk Paint Look Streaky?
- The Real Causes of Brush Marks and Uneven Finish
- The Best Brush for Chalk Paint (and What to Skip)
- Step-by-Step: How to Get a Smooth Finish With Chalk Paint
- How Long Does Chalk Paint Take to Dry Before Recoating?
- How Paint Consistency, Temperature, and Humidity Affect Streaking
- How to Fix Streaks After the Paint Has Dried
- Choosing Your Chalk Paint Supplies at JunQtique
- Frequently Asked Questions
Why Does Chalk Paint Look Streaky?
Chalk paint streaks come from too much paint, the wrong brush, or recoating before the first coat dries.
Here is the key idea most guides skip: chalk paint is designed to dry fast and hold texture.
Once you understand the causes, the fix is simple. Below: the real causes of brush marks, the right tools, and a full step-by-step method.
The Real Causes of Brush Marks and Uneven Finish
The biggest cause of an uneven finish is an overloaded brush. Dip too deep and paint floods the surface, drying in raised ridges before it can level. A few other culprits show up in almost every streaky project:
- Too much paint on the brush. The number one issue. Thin coats win every time.
- A stiff or cheap brush. Stiff bristles drag and leave lines.
- Recoating too soon. Wet paint under a new coat pulls and streaks.
Chalk paint rewards a light touch. You are not painting a wall, you are laying down color in thin, even passes and letting the paint do the work.
The Best Brush for Chalk Paint (and What to Skip)
The best brush for chalk paint is a wide, flat brush with soft, flexible bristles.
Skip stiff hardware-store brushes and cheap foam brushes for large areas. Stiff bristles leave drag marks. Foam brushes soak up too much paint and lay it down unevenly.
Annie Sloan's own large flat brush is built for this job, its flat-cut bristles lay a thin, even coat across a whole drawer front in a few passes.
If you want to buy the exact tool we recommend, you can shop the large flat brush for big surfaces, or pick up the smaller detail brush for edges and narrow spots.
Brush vs. Foam Roller: Which Surface Needs Which
Use a brush on flat panels, edges, and detailed pieces. Use a foam roller on large, flat areas like tabletops and cabinet sides, then tip off the roller marks with a dry brush.
A foam roller lays paint down fast and evenly, but it can leave a stippled texture and fine roller marks, especially if you press hard. The fix: roll it on, then run a dry brush lightly over the wet surface to smooth the texture.
Here is a quick guide:
| Surface | Best Tool | Watch Out For |
|---|---|---|
| Flat tabletops | Foam roller + dry brush | Roller stipple |
| Drawer fronts | Wide flat brush | Overloading |
| Edges and trim | Small flat brush | Drips and runs |
| Carved details | Small brush, light touch | Paint pooling in grooves |
Step-by-Step: How to Get a Smooth Finish With Chalk Paint
Follow these steps in order and you will get a smooth finish with chalk paint, even on your first project.
- Stir the paint well. Mix from the bottom up so the color and consistency are even.
- Load the brush lightly. Dip only the tips of the bristles, then tap off the excess.
- Apply a thin, even coat. Work in one direction with long, light strokes.
- Keep the brush moving. Do not press hard or go back over wet paint.
- Let the coat dry fully. Do not touch it until it is dry to the touch.
- Sand lightly between coats. A light pass with fine sandpaper knocks down ridges.
- Wipe off the dust. A clean, dry cloth removes grit before the next coat.
- Add a second thin coat. Two thin coats beat one thick coat every time.
- Finish with wax or topcoat. A protective finish evens out the look and adds durability.
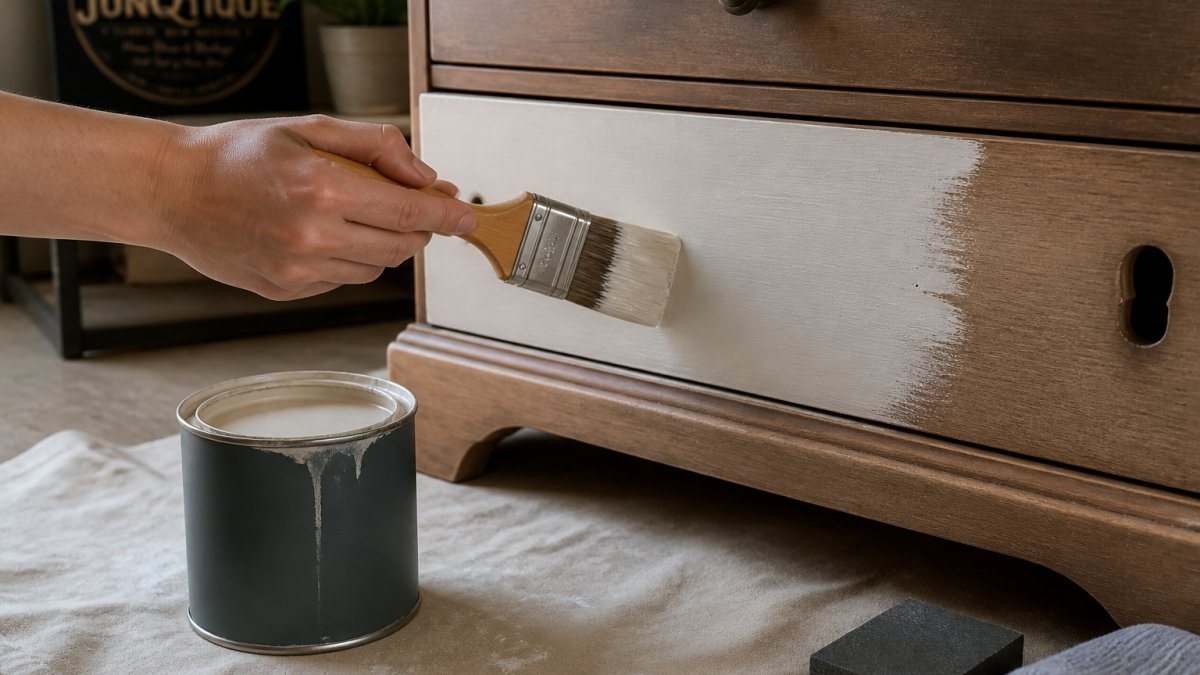
Watch out: going back over a coat that has started to dry is the fastest way to create streaks. Once paint sets, leave it alone and fix it on the next coat.
How Long Does Chalk Paint Take to Dry Before Recoating?
Chalk paint usually dries to the touch in about 30 minutes to an hour, and most pieces are ready for a second coat in one to two hours. But that range is a starting point, not a guarantee, and recoating too early is one of the most common reasons a second coat drags the first one into streaks.
Chalk paint dries fast because it is water-based with a high solids load and very little film former. Water leaves the film quickly, but the surface can feel dry while the layer underneath is still soft.
The touch test that actually works
A light fingertip touch is not enough. Press the back of a fingernail or knuckle gently in an inconspicuous spot. If the paint feels cool, tacky, or gives at all, it is not ready; if it feels firm, dry, and slightly chalky, you can recoat. Second check: press a clean dry cloth to the surface for a few seconds, any pigment transfer means wait longer.
What changes the drying time
- Film thickness. A thin coat dries in the 30-to-60-minute window. A heavy coat can take several hours on the surface and much longer underneath. This is one more reason thin coats win.
- Room temperature. Most practitioners find the sweet spot is roughly 65 to 75 degrees Fahrenheit. Below about 60 degrees, drying slows noticeably and the paint can stay soft for hours.
- Humidity. High humidity slows water evaporation. In a damp basement or on a rainy day, add drying time rather than guessing.
A practical recoat schedule
For a typical dresser in a normal room, plan one to two hours between thin coats and two coats total for most color changes. In a cool garage in winter, double that and knuckle-test before every coat. Never speed things up with a heat gun or hair dryer on high, uneven heat dries the surface faster than the layer below and creates the same drag problem.
A simple rule: if the paint feels cool or tacky, it is not ready. If it feels dry and smooth, you can add the next thin coat.
How Paint Consistency, Temperature, and Humidity Affect Streaking
Paint consistency, temperature, and humidity all change how chalk paint flows, and flow decides whether brush marks level out or stay put. It explains why two people using the same brush and the same tin can get completely different finishes.
Why consistency matters more than technique
Chalk paint is formulated to be thick, that thickness gives it the matte, textured look and lets it grip a surface without a primer.
Annie Sloan's official guidance is to add a little water to help the paint go on smoothly, and a few drops can make a real difference on a dry, warm day (FAQs | Chalk Paint® & Tools).
A common mistake is misting the surface or dipping a wet brush straight into the tin. That introduces water unevenly, so some areas flow and others do not, leaving blotchy color.
Temperature: the fast-dry trap
Warm air speeds evaporation, and chalk paint already dries fast. Above roughly 80 degrees Fahrenheit, the surface can skin over before your brush reaches the end of a panel, dragging across a partially set film and leaving ridges.
The fix is to work smaller. Instead of coating a whole tabletop in one pass, do it in sections of a couple of feet, keep a wet edge, and blend each section into the last before it sets.
Humidity: the slow-dry trap
High humidity slows evaporation, so the paint stays open longer, helpful up to a point, since it has more time to level. Past that point it stays soft, sags on vertical surfaces, and picks up dust.
Low humidity is the opposite problem. In heated winter air, paint can dry almost on contact. The same sectioning strategy that works for heat applies here, plus a few extra drops of water in the tin.
A quick environmental checklist
| Condition | What Happens | What to Do |
|---|---|---|
| Hot and dry (above 80 F) | Surface skins over, brush drags | Work in small sections, keep a wet edge, add a few drops of water |
| Cold and damp (below 60 F, high humidity) | Paint stays soft, sags, dust sticks | Extend drying time, check with the knuckle test, avoid vertical overload |
| Windy space | Top dries before the layer below | Close windows and doors, move air in the room not across the piece |
| Very low humidity | Paint dries on contact | Add water to the tin, section the work, move quickly |
Temperature and humidity matter as much as consistency, and all three are easier to manage than most people think. Adjust the paint, the room, and your section size, and the paint will do the leveling for you.
How to Fix Streaks After the Paint Has Dried
You can fix streaks after the paint has dried by sanding them lightly and adding one more thin coat, the repair step most guides leave out.
Here is how to do it:
- Let the piece dry fully. Do not sand wet or tacky paint.
- Sand the streaks lightly. Use fine sandpaper and a light touch to knock down the ridges.
- Wipe away the dust. A clean cloth keeps grit out of the next coat.
- Apply one thin coat. Use a light hand and long, even strokes.
- Finish with wax. A clear wax topcoat evens out the surface and protects it.
For the finishing step, Chalk Paint Wax gives you a clear, protective topcoat that smooths the final look.
A common mistake is sanding too hard and cutting through to the layer below. Chalk paint sands easily, so light pressure and a gentle pass remove most ridges.
Choosing Your Chalk Paint Supplies at JunQtique
The right supplies make a smooth finish almost automatic. A wide flat brush, a small detail brush, fine sandpaper, and a good wax will carry you through any project without the streaky mess.
At JunQtique, we stock professional-grade Chalk Paint supplies alongside vintage pieces and bespoke furniture, so you can start or finish a project in a single stop. New to refinishing?
Here is what matters most when you shop:
- A wide flat brush for large, flat surfaces.
- A small flat brush for edges and detail.
- Fine sandpaper for smoothing between coats.
You do not need a garage full of tools. You need the right ones.
Frequently Asked Questions
Why does my chalk paint look streaky after it dries?
Streaks usually come from three things: an overloaded brush, coats applied too thick, or recoating before the first layer is fully dry. When paint goes on heavy, the brush drags through wet paint and leaves ridges that set as it cures. Chalk paint streaks also show up when the surface underneath is uneven. Work in thin coats, keep a light touch, and let each layer dry fully before adding the next one.
Can you fix brush marks in chalk paint once it has dried?
Yes. Once the paint is dry, sand the marked area lightly with fine-grit paper until the ridges flatten, then wipe away the dust. Apply one more thin coat with a light touch and let it dry. For deeper marks, a second sanding pass followed by a fresh coat usually evens out the finish. Annie Sloan Chalk Paint responds well to this because it sands to a smooth surface without gumming up the paper.
Should you use a roller or a brush with chalk paint?
It depends on the shape of the piece. A brush gives you control on legs, edges, and carved details, while a foam roller covers large flat areas like tabletops and cabinet doors faster. Rollers can leave their own texture if you press hard or load too much paint, so keep the pressure light and finish with a brush pass to blend. Many refinishers use both on the same piece.
How many coats of chalk paint do you need for even coverage?
Two thin coats handle most furniture, though dark colors over light wood may need a third. Thin coats dry faster and level better than one heavy layer, which is the main cause of an uneven finish. Let each coat dry completely before recoating, and sand lightly between coats if you feel any roughness. A protective topcoat afterward seals the finish and helps it hold up to daily use.
Ready to turn a tired piece into something beautiful? JunQtique can help you pick the right Chalk Paint supplies for your project, from brushes to wax. Get started with JunQtique and create a finish you will be proud to show off.