 blog
Beginner Furniture Refinishing Supply List for 2026
Last Updated: October 23, 2026
Quick Summary
A beginner furniture refinishing supply list starts with ten items: a mild cleaner or degreaser, a scraper, sandpaper in two grits, a sanding sponge, wood filler, a putty knife, a quality paintbrush, painter's tape, a drop cloth, and Chalk Paint with a wax or topcoat. Buy these basics, finish one small piece, then add tools as projects demand them.
- A carbide scraper removes flaking finish faster than sandpaper and leaves a flatter surface.
- Chalk Paint from Annie Sloan is our pick for first projects because it bonds without a primer.
- Two thin coats beat one thick coat every time and prevent drips and brush marks.
- Fine grits and a sanding sponge only on veneer, since coarse grits cut through it in seconds.
- Add nitrile gloves, eye protection, and a dust mask for sanding from day one.
Table of Contents
- The Minimum Viable Furniture Refinishing Supply List
- Furniture Refinishing Tools: What to Buy and When to Use Each
- Choosing the Best Paint for Furniture (and What to Skip)
- Furniture Paint Brushes and Application Tools That Prevent Streaks
- Furniture Wax and Topcoat: Sealing Your First Project
- Matching Supplies to Your Furniture and Finish
- Safety Gear, Product Handling, and Common Beginner Mistakes
- Conclusion
- Frequently Asked Questions
The Minimum Viable Furniture Refinishing Supply List
A beginner furniture refinishing supply list starts with ten items and nothing more. Gathering every tool at once is the fastest way to spend money on things you will not touch for months.
At JunQtique, we see new refinishers stall because the supply aisle overwhelms them.
Furniture refinishing is the process of cleaning, repairing, and coating a piece of wood furniture to restore or change its look. It covers everything from a light refresh to a full color change.
That definition matters because it tells you what the supplies are for. Each item on this list serves one of those jobs.
The Ten Items You Actually Need to Start
- A mild cleaner or degreaser for grime and kitchen residue
- A scraper for loose finish and flaking edges
- Sandpaper in two grits for smoothing
- A sanding sponge for curves and corners
- Wood filler for dents and small holes
- A putty knife for applying filler
- A quality paintbrush sized to your piece
- Painter's tape for edges and hardware lines
- A drop cloth to protect your floor
- Chalk Paint and a wax or topcoat to finish
That is a complete starter kit. Everything else in this guide is an upgrade, not a requirement.
Furniture Refinishing Tools: What to Buy and When to Use Each
Furniture refinishing tools fall into two groups: the ones you need on day one and the ones you buy when a specific piece asks for them. Knowing the difference keeps your budget intact. Below is a starter kit broken into must-haves and optional upgrades, with typical retail ranges so you can plan before you shop.
The Minimum Viable Kit (Buy These First)
These are the items that let you finish one small piece without a second trip to the store.
| Item | Typical Price Range | Why It Earns a Spot |
|---|---|---|
| Mild cleaner or degreaser | $8-$15 | Removes grime, polish film, and kitchen residue that block adhesion |
| Carbide or pull scraper | $10-$20 | Lifts flaking finish faster and flatter than sandpaper |
| Sandpaper, medium and fine grits | $6-$12 per pack | Smooths and scuffs between coats |
| Sanding sponge | $4-$8 | Reaches curves, legs, and spindles |
| Wood filler | $8-$15 | Fills dents, gouges, and old hardware holes |
| Putty knife | $5-$10 | Applies filler cleanly |
| Quality paintbrush | $12-$25 | Even release means fewer lap marks |
| Painter's tape | $5-$10 | Protects edges and hardware lines |
| Drop cloth | $8-$20 | Protects floors and nearby furniture |
| Chalk Paint plus wax or topcoat | Varies by size | The finish itself |
A realistic starter total requires budgeting before you add anything else.
Optional Upgrades (Buy When the Piece Asks)
- Power sander: saves hours on large flat tops. Skip it for a first chair or side table, where hand sanding gives more control and fewer gouges.
- Small roller: speeds up large flat panels but leaves texture on trim.
- Foam brushes: handy for tight spots and touch-ups, but they shed and are not a substitute for a real brush.
- Extra clamps: only needed when you are gluing a structural repair.
- Respirator: worth it the moment you sand more than a small piece indoors.
Sanding Tools, Abrasives, and Dust Removal
Start with sandpaper and a sanding sponge. A power sander is a later purchase.
- Medium grit smooths rough areas and scuffed edges
- Fine grit preps between coats and softens sheen
- Sanding sponges reach legs, spindles, and curved trim
- A vacuum and tack cloth lift dust before paint
Dust is the quiet killer of a smooth finish. Wipe down after every sanding pass, not just the last one. A tack cloth costs a few dollars and is the cheapest insurance against a gritty finish.
An electric sander saves hours on large flat tops. Skip it for your first chair or side table, where hand sanding gives you more control and fewer gouges.
Scrapers, Wood Filler, and Repair Basics
A carbide scraper removes flaking finish faster than sandpaper and leaves a flatter surface. Use it with light pressure and follow the grain.
Wood filler handles dents, gouges, and old hardware holes. Press it in with a putty knife, let it cure, then sand flush. For structural cracks, wood glue and clamps do the real work before filler goes anywhere near the piece.
Choosing the Best Paint for Furniture (and What to Skip)
The best paint for furniture is a chalk-style paint that bonds without heavy sanding and dries to a matte finish. It suits beginners because it hides small imperfections and touches up easily.
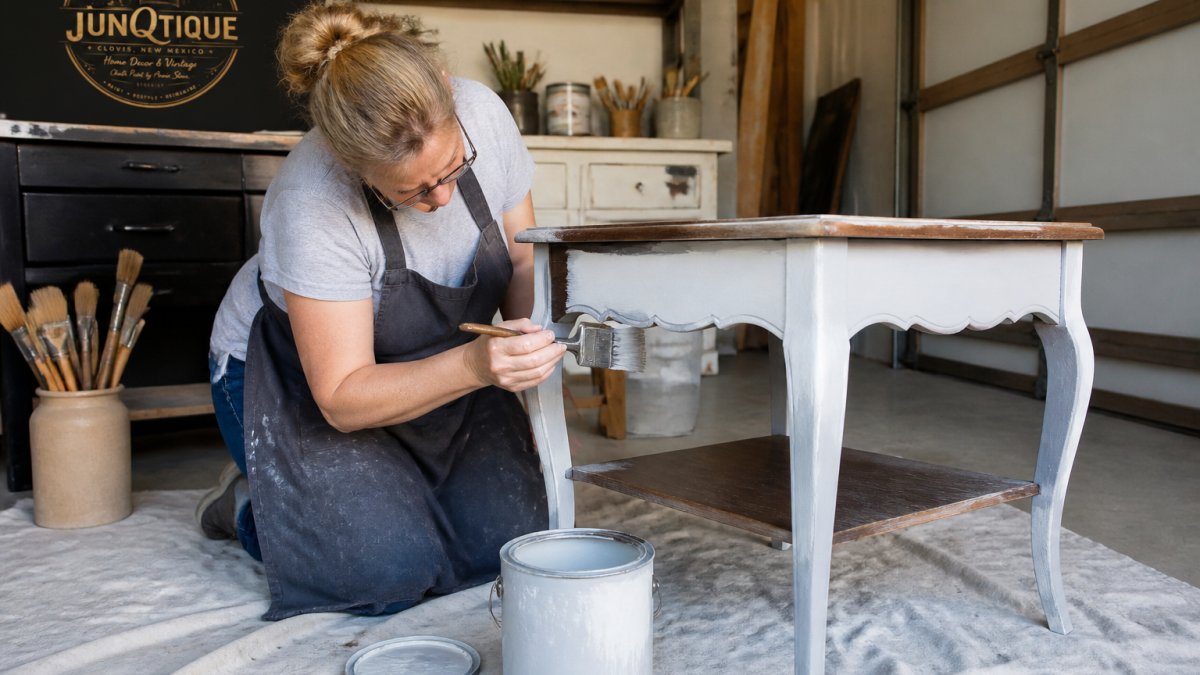
Chalk Paint from Annie Sloan is our pick for first projects.
What to skip: high-gloss latex on a piece you have not tested, and any paint that needs a perfect surface underneath. Gloss shows every flaw. For a first project, matte is forgiving.
Furniture Paint Brushes and Application Tools That Prevent Streaks
Streaks come from the brush, not the paint. A good furniture paint brush holds its shape, releases paint evenly, and leaves fewer lap marks.
Pick a brush sized to the surface. A wide brush covers a tabletop fast. A small round brush gets into trim and corners.
- Natural-bristle brushes suit chalk and wax finishes
- Synthetic brushes work well with water-based paints
- Foam brushes are handy for small touch-ups and tight spots
- A small roller speeds up large flat panels
Apply thin coats and let each one dry fully. Two thin coats beat one thick coat every time, and thick paint is where drips and brush marks come from.
Furniture Wax and Topcoat: Sealing Your First Project
Furniture wax and topcoat protect the paint and decide how the piece feels to the touch. Wax gives a soft, low-sheen finish that suits vintage and farmhouse styles. A topcoat gives more resistance to water and wear.
For most first projects, clear wax is the right call. Apply a thin layer with a brush or cloth, let it sit briefly, then buff off the excess.
Reapply wax on high-touch areas over time. Tables, chair arms, and drawer fronts take the most wear, so give them a second pass.
Matching Supplies to Your Furniture and Finish
The right supply list changes with the piece in front of you. A painted dresser and a stained table need different kits, and the surface underneath decides which tools earn their place. This is the section most supply lists skip, and it is where beginners waste the most money.
| Piece or Finish | Key Supplies | Skip For Now |
|---|---|---|
| Painted vintage dresser | Cleaner, sanding sponge, Chalk Paint, clear wax | Power sander |
| Solid wood table | Cleaner, scraper, wood filler, topcoat | Wax only |
| Chair with spindles | Sanding sponge, small brush, wax | Wide roller |
| Small side table | Cleaner, fine sandpaper, paint, wax | Electric sander |
| Damaged drawer front | Wood filler, putty knife, glue, clamps | Stripper |
| Veneer-topped piece | Fine sandpaper, sanding sponge, Chalk Paint, wax | Coarse grits, power sander |
| Laminate or melamine | Cleaner, sanding sponge, Chalk Paint, wax | Stripper, stain |
| Previously waxed piece | Cleaner, sanding sponge, Chalk Paint, wax | Stripper |
How the Kit Changes by Surface
- Solid wood: the most forgiving surface. You can sand, scrape, fill, and refinish with the full starter kit. A scraper and wood filler earn their keep here.
- Veneer: a thin wood layer over a substrate. Fine grits and a sanding sponge only; coarse grits and power sanders cut through the veneer in seconds and cannot be repaired. Chalk Paint is a strong choice because it bonds without heavy sanding.
- Laminate and melamine: slick manufactured surfaces. Skip stain entirely; it will not absorb. A cleaner, a light scuff with a sanding sponge, and Chalk Paint give the best odds of adhesion.
- Previously finished pieces: you do not always need to strip. If the existing finish is sound and well-bonded, a clean and a scuff are enough for Chalk Paint. Save the stripper for flaking or cracked finishes.
Paint Versus Stain: A Different Kit
Staining instead of painting? You need a stain and a sealer, plus more sanding patience. Paint hides grain and small flaws. Stain shows both, so every sanding scratch and filler patch becomes visible. If the piece has veneer, laminate, or a repaired area, paint is the safer first project.
Safety Gear, Product Handling, and Common Beginner Mistakes
Safety gear belongs on the list from day one. Add nitrile gloves, eye protection, and a dust mask for sanding. Work in a ventilated space, and keep solvent-based products away from open flames.
Common beginner mistakes we see:
- Painting over grime instead of cleaning first
- Skipping the dust wipe between coats
- Loading the brush with too much paint
- Sanding through veneer on a thin-topped piece
- Rushing the dry time between coats
Each one costs a redo. None of them costs money to avoid.
Conclusion
The hardest part of a first refinishing project is starting with a supply list you trust. Buy the ten basics, finish one small piece, and let the next project tell you what to add.
JunQtique carries professional-grade Chalk Paint supplies alongside vintage pieces and home decor, so you can pick a project and the products for it in one place. Our team can help you match paint, wax, and brushes to the piece you have in mind.
Frequently Asked Questions
What supplies do I need to refinish furniture as a beginner?
Start with a cleaner and degreaser, a few sanding sponges and abrasive pads, a putty knife with wood filler, a quality paintbrush sized to your piece, a can of Chalk Paint, and a furniture wax or topcoat to seal it. Add a tack cloth, gloves, and a drop cloth, and you have a working starter kit. You do not need a power sander or a full tool chest for your first furniture refinishing project; add those later once you know what you enjoy working with.
Can you refinish furniture without sanding?
Yes, many pieces can be refreshed without heavy sanding, especially when you use a chalk-style paint that bonds to previously finished wood. Light scuffing with a sanding sponge helps paint grip, and a tack cloth removes the dust afterward. If the old finish is peeling or flaking, you will need more abrasion or a scraper to get a stable surface. Always test on a hidden spot first so you know how the paint behaves on that particular piece.
How do I choose the best paint for furniture and the right brush?
Match the paint to the look you want and how much wear the piece will get. Chalk-style paint gives a matte, vintage finish and covers well with minimal surface work. For brushes, a synthetic-bristle brush around 2 inches wide suits most tabletops and drawers, while a foam brush helps on trim and small details. Buy one good brush rather than three cheap ones; stray bristles are the fastest way to a streaky finish you have to sand back.
How much do beginner furniture refinishing supplies cost?
Cost depends on how many pieces you plan to do and whether you buy a kit or individual items. Check JunQtique's site for current pricing on Chalk Paint and supplies.